Friday, September 6, 2013

Berry Balsamic


Right now Lettuce is in its full splendor. I understand when some people might think that lettuce and salads are boring. I have had those kinds of salads too; Rusty lettuce, with rigid and dry shredded carrots, that need to be doused in dressing to be palatable. I understand your apprehension to be excited about salads.  Really, I do.

You have to understand, garden fresh salads are a million miles from boringville.
The stuff that grows in the Thunder Bay is beautiful. Leaves ranging from pale to dark green to brilliant burgundy. Some with a crunch, and some velvety smooth. Small little leaves of arugula and sorrel to larger leaf lettuces. So today, to accentuate the lovely colours, shapes and flavours of these delectable greens, I am going to share with you an amazing recipe for one of my favourite salad dressings.

Strawberry Balsamic Dressing   
2 cups of fresh strawberries, hulled (If you don’t have any, raspberries would be fab as well)
3 leaves of basil (if you like basil)
½ cup of balsamic vinegar
1 TBSP lemon juice
1 TBSP Sugar, honey or maple syrup  (or to taste)
Olive oil

Put the strawberries and basil into a food processor, and puree until smooth.  Place the strawberry basil mixture in a saucepan and add the basil, lemon juice, and sugar. Bring to a simmer, and let reduce by ½. Whisk in your olive oil and serve over your salad- It is as simple as that. A delicious, fresh tasting, and even good for you salad dressing!

What kind of salad should you serve it with? That is ultimately up to you- But here are some wonderful combinations that you could try.

-Spinach, chicken, strawberry and sliced almond
-Arugula, white beans and walnuts
-Cucumber, feta, green onions and tomato
-Watermelon, feta, pistachios
-Tomato, cheese, basil
-Sorrel, avocado, grilled nectarines.
-Butter lettuce, crisped bacon, bleu cheese, maple pecans.
-Snow peas and pine nuts.

Make sure you let me know if you come up with a great salad idea- I am always game to try something new!
Also, if you haven't tried it- plain balsamic vinegar drizzled over fresh strawberries is heavenly!

Originally posted 7/29/2011 on TBnewswatch.com

Buenos Nachos


We all know that there are certain manners that we are supposed to use while eating. Chew with your mouth closed, don’t put your elbows on the table, put your phone away, and so on. Since childhood these rules associated with eating have ingrained themselves into our mind, and we often follow them on autopilot.  When we are out somewhere nice for dinner, a guest at someone’s houses, or a holiday we tend to adhere to these polite manners more than usual.  But, when out with friends or a casual dinner- you will often see elbows on the table, and quite a few remarks made with a mouthful of food.

But, there is something that we are not taught from childhood.  It is pretty important. Failing to follow the rules could become just downright awkward.

Nacho Etiquette.

Picture this. You and some friends are out having drinks one day, or maybe you are at a meeting with some folks from work.

You decide to share the nachos.  The waitress brings them to your table, and sets the heaping mound of cheese covered chips on the table. But now what? This isn’t like pizza, where all pieces are created equally. No, absolutely not. There always is that one chip in the very middle of the plate that is just loaded with cheese, sometimes referred to as the “Mother  Nacho.”  More cheese than any other chip, with a healthy dose of peppers, meat, onions, jalapenos.

You are all eyeballing it, everybody wants it.
When you are eating them by yourself, of course you are going to take it first.  But what about when you are with others? Is it worth incurring the wrath of your fellow diners?  What is a nacho lover to do?

Should you take it? Or do you start on the side closest to yourself, and race to the cheesy centre? Apparently, it is polite to take the chips closest to you, making sure not to touch other people’s chips with your grubby hands.

Another oft debated facet of Nacho etiquette is double dipping. Of course it makes the most sense if everyone dishes their salsa, guac and sour cream on to their own plates. But, you know as well as I do, that it just isn’t the same. You just can’t scoop it, it just scoots to the other side of the plate and makes a big mess.  The little dishes they give you are perfect for dunking, even if they are communally shared.  So, if you aren’t dishing out onto separate plates, what is the deal?  Are you allowed to dip in salsa, and then the sour cream, or the salsa and then the guac? Are you really only allowed one fabulous dunk per chip?  I think that it is acceptable, though you should generally ask your fellow diners first if they care. As long as you haven’t put it in your mouth yet, a little splat of salsa in the guacamole really shouldn’t be that big of a deal.

Do you follow any kind of nacho etiquette?  If you aren’t sure, it might be a good idea to grab some friends and co-workers and go find out.

The Great Scape

As I mentioned last week, we are going to delve into the wonderful, and oh so exciting, world of garlic  scapes. Garlic itself is pretty standard in cuisine throughout the world. Most of us are familiar with the taste, and at least a few ways to prepare it. A much underappreciated part of the plant is the scape. The scape is that little green centre that you sometimes find when you cut into a clove of garlic. When the bulb is planted and allowed to grow, the scape emerges. Green and twirling with a beaky flower at the end.  Despite their somewhat alien appearance, garlic scapes are a culinary gem.


They have been at the market for a couple weeks now, and have been showing up on some peoples CSA’s. I have heard the question quite a few times now “What do I do with them?” More like what DON’T you do with them!  In China they are used in stir fry with garlic, broccoli and snow peas. They can be tossed in with your favourite pasta or on top of a salad.

I picked up a bunch from Mile Hill Farms stand at the market last week. It was pouring rain, but I was so set on getting a bunch of scapes, that I hardly noticed. I had my heart set on making garlic scape pesto`. Mile Hill Farms actually had Scape pesto available for purchase, and I was very tempted to buy that, but I was looking forward to making it myself.
I didn’t end up making it.
After about a half dozen-“ Ooh what about this…or what if I did that” moments,  I came up with 2 recipes that I really wanted to try.

So without further ado.

Scape Hummus
3 garlic scapes- cut into 1-2 inch pieces
1 can chickpeas- drained, liquid reserved.
Juice of ½ lemon
¼ cup olive oil
Salt and pepper to taste

Put everything in the food processor and blend.  If it is dry, add a little of the reserved liquid from the chickpeas. Have a sample and adjust the lemon, olive oil and pepper to your liking. Serve with a drizzle of olive oil over the top with a little more cracked pepper.


Garlic Scape Stuffed Tomatoes
If you go to the market you have undoubtedly seen, and perhaps stood in the line for DeBruins tomatoes. There is a reason for that lineup, the tomatoes are great. They sell little clamshells of small bite-sized tomatoes, and it is these that we are going to stuff!
After your tomatoes are washed, set up a cutting station. Cut the bottom of the tomato off, so that the stem end remains (so that it can provide a stable base. After all, you don’t want all of your hard work rolling on to the floor!)  With a small spoon scoop out the insides.  It’s just like a pumpkin but on a much smaller scale. Repeat with all of the tomatoes until you have a lovely little forest of tomato cups.

For the filling you will need
2 tbsp butter
½ onion- diced
2 scapes- sliced into ¼ inch pieces.
½ cup cream cheese- softened
½ cup sour cream.
½ cup finely grated extra old gouda or parmesan.

Melt your butter in a saucepan, and add the onion cooking over low heat. After the onions begin to turn translucent, add the scapes.  Cook over low heat, stirring often until the onions are golden.  In a bowl, mix the onion/scape mixture with the cream cheese, sour cream and the cheese until it is all incorporated.
To fill the tomatoes, put the filling into a sandwich size ziplock bag, and cut off the corner. Carefully pipe the filling into each of the emptied tomatoes. Using a bag like this helps avoid a giant mess, and your treats will look great.
Garnish with some chives, scapes, or whatever you’ve got around. Serve immediately , or chill until ready to use.


Scapes are available in your garden, Belluz Farms, Mile Hill Farms and online at www.marketstore.locallygrown.net  where you can buy locally from the comfort of your home or office!
Have you tried cooking with scapes? I’d love to hear how you use them.


RhubarB-B-Q


Rhubarb. Perfect in pies, scrumptious with sugar, and great on the grill! Yes, you read that correctly, on the grill.  Making barbecue sauce is an excellent way to get to get more out of your rhubarb. It is incredibly tasty, very easy, and sometimes you just want to try something different! If you are not the proud owner of a rhubarb shrub, all hope is not lost. You can pick up a bunch at the Farmers Market.

Rhubarb-b-Que Sauce.

-3 cups of rhubarb- sliced
-1 cup of water
-½ cup onion, diced
-1 or 2 cloves of garlic, minced
-2/3  cup of brown sugar
-1T vinegar (white, cider, balsamic- whatever you have around)
-½ cup of tomato paste or Ketchup
-1T Cayenne Pepper
-Oil
-S and P to taste

Put the water and the rhubarb in a saucepan over low heat. Cook for about 5 minutes, or until the rhubarb is getting soft. Remove from heat.
Heat up 1T oil in a skillet and cook your onions for about 3 minutes, toss in the garlic and cook for a minute or 2 more-  Add to the Rhubarb mixture. Put it into a blender, food processor, or use and immersion blender to process until smooth. Place back into the saucepan over low heat. Add the brown sugar, vinegar, tomato paste, cayenne, and S and P to taste.  Let it simmer for about an hour, stirring occasionally. If it gets too thick for your liking, you can add some water, broth, wine, beer or whatever you happen to be drinking at that time, until it is to the desired consistency.  If you accidentally add too much, just let it simmer for longer.
Will keep in the fridge for up to a week.  Use as you could any barbecue sauce, and it makes a great dipping sauce for anything- Chicken, pork, fingers….mmmmm.

What did I put it on? I know you are anxious to know, I put it on Brisket!

Brisket on the Grill 

Brisket can be an amazing cut of meat if you have the time and patience to do it right. Most recipes will call for a 8-10 lb brisket, cooked on a smoker, or on a charcoal grill; unfortunately I own neither of the above. What I do have is a gas grill, and yes, you can cook an absolutely wonderful and amazing brisket on a gas grill.
I picked up an Angus Beef brisket from Tarrymore Farms at the Farmers Market. They are at the Market every week, at the stall just inside the door. In addition to wonderfully fresh and delicious eggs, they have a freezer full of Beef, pork, and if you are lucky, lamb.

When I started going to the market, I would never pick up any of the local meat products. Primarily because they were frozen. I didn’t want to buy my meat frozen, why would I do that when I could just go to the grocery store and get something that was already ready to go. But this meat is not “processed” in a giant factory hundreds of miles away. This meat didn’t have to take a road trip to get here, over who knows how many days.  This local beef is processed here in town and immediately frozen. In a strange way, it is the freshest that you can get. If it is thawed correctly, it is quite wonderful. So, after I got over my snobbish attitude about buying “Frozen Food,” I completely fell in love with the variety of foods that were available to me and my family. I was very excited to finally try cooking brisket on my own, because I had eaten it before and absolutely adored it (Hello, Famous Daves!) But, all of the recipes called for a smoker, and since I don’t have one, I was discouraged, but fear not, we can totally make this happen!

One of the first challenges is that most recipes call for a giant brisket. 8-10 lbs is too big, even for me. So, I picked up one that was somewhere between 3 and 4 pounds. Some people like to do a rub on the brisket before it is cooked, even the night before. Salt, pepper, brown sugar, cayenne, garlic powder. Whatever your heart desires!

You will also need hickory chips. This is something that you should purchase at the store, and not gather from the forest floor. Soak the woodchips for a half hour to an hour- drain and put in a metal dish on the bbq, along with a small handful of un-soaked chips.

Heat your BBQ to 220 degrees F .

Prepare your brisket by laying it, fat side up, on a foil lined cookie sheet or foil pan.  Place the brisket on the grill, on the side opposite from the heat and let it cook. After 3 hours you can start putting your Rhubarb-B-Que sauce on, repeating once an hour.  Continue to cook until it has been on the grill for a total of 6-8 hours, and has reached an internal temperature of 160 degrees.  When it is done, take it off of the grill, and cover with foil, and allow the meat to rest for 15-20 minutes before you slice it. I know you are anxious to eat, but this is a crucial part of the cooking process. You have already waited 8 hours, can you really not wait 20 more?
Once your 20 minutes is up, remove the foil and slice the brisket. It should be moist in the centre, with a dark “bark” on the outside of the meat.
This is a great dish to try on the weekend, especially a long weekend!
What a coincidence!

Enjoy the recipe, and your long weekend!
  

Originally Posted 6/30/2011 on tbnewswatch.com

Starting the summer with Elk Burgers

I am a Foodie.

I love everything about food.

I love to cook it; I love to write about it, read about it, photograph it, and of course eat it! Some might even say that I am a little bit obsessed. But, let me assure you, there is nothing little about this obsession.

One of my favourite things is to find great local ingredients, and learn how to cook with them. The difference between something grown in your own backyard versus trucked in is immeasurable. And as much as I love to cook, it is a wonderful treat to experience the cooking of others.

Everyone’s cooking is different, with their own techniques and influences; and experiencing that is a great way to learn and gain inspiration for your own cooking.

The world is full of wonderful food, and a lot of it is here in Thunder Bay.

We have great local chefs and cooks from all over Canada and the world, great restaurants, amazing local food producers, and of course fields, forests and lakes full of edibles.

I hope you will agree to join me on this incredibly edible adventure to explore the Local Flavour of Thunder Bay!

******


What’s on your plate in Thunder Bay elk burgers 
Summer is here at last, and if you are like me, you will agree that one of the best things about the season is barbeque.

There’s nothing like that sizzle as you throw your food on the grill. The smoky aromas alerting your neighbors that now might be an ideal time to stop over, “Just to say ‘Hi.’”

Whether you are a carnivore or vegan, grilling is a part of summer.

While I love steak, veggies, ribs, brisket and so on, there is really nothing like a great burger. Lucky for us, we have access to a lot of local meat producers.

I am sure many of you have seen the Rainy River Elk Company at the Thunder Bay Country Market and a lot of you have tried it as well. But elk is one of those things that some people might think is so similar to beef, that ‘what is the point?’

Or maybe some people are apprehensive because elk is not an everyday food for most. Well have no fear, for not only is cooking elk easy, but it is delicious. And isn’t that the whole point?

Elk is a very lean meat, so it can tend to be a bit dry, but by mixing it with a bit of ground pork, you can have the delicious and distinctive flavor of elk, along with the juiciness from the pork and pancetta.

This is my recipe for elk burgers.

Elk Burgers
(6 servings) 

·   1 pound of ground elk.
·   1 pound of ground pork
·   1/4 of an Onion, diced
·   1/4 cup of chopped pancetta (or bacon)
·   Pepper
·   A dash of soy sauce
·   1/4 cup Bread crumbs, or 1 slice of day old bread
·   Butter

In a skillet melt a tablespoon of butter and add your onions, cook until they are golden and then add the pancetta. Continue to fry until the pancetta is cooked through and browned.

Put the bacon and the onions into the food processor along with the day old bread/bread crumbs, and puree for a few seconds. This step is not absolutely necessary (I only started to do it to hide the onions from my kids, who love these burgers by the way).

If you are without a food processor just give it all a good chop.

Mix the onion and pancetta with the ground meat, add a dash of soy sauce and add some pepper (and if I’m feeling sassy, I might even add a tiny bit of maple syrup)

Mix everything together with your hands and form into 6 patties.

And now the fun part: Go outside and start the barbeque.

While it is warming up, you could always help yourself to a cold beverage...you know, I’m just sayin’.

When the grill is nice and hot, put the burgers on and enjoy the sizzle!

And be sure you don’t forget the cheese!


(Originally published 6/22/2011 on tbnewswatch.com) 

Thursday, May 24, 2012

May Long Weekend


Our original plans for the weekend didn't end up working out,
so we headed to Derek's camp for the night.

Felix was so excited, that he was dancing in the car.


Post car ride snack of some grapes, with his pal, Hudson.

Derek, Der grillmeister making some chicken


Stairway heading to the lake.


Hummingbird Feeder


Busters Blueberry BBQ Sauce!
Delicious!


The turkey vultures began to circle.


Maybe they wanted some Busters chicken too?


Sandstone Lake


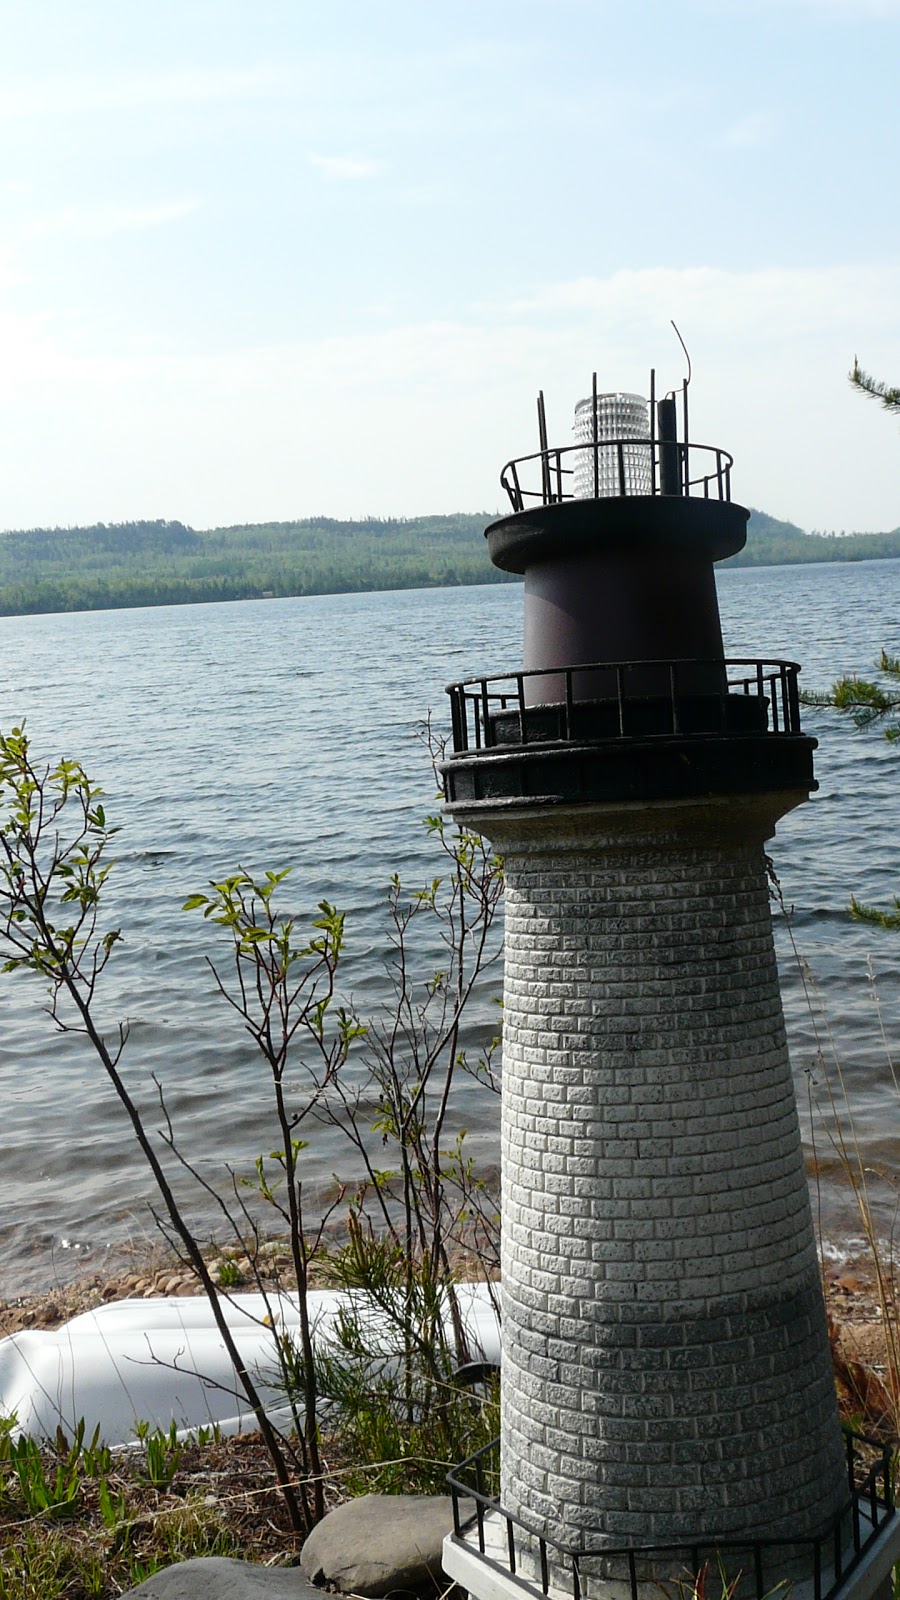
The lighthouse


Shore


Loch. note the waterguns in the back pockets


Beautiful view!


Land Ho!


Monday, May 14, 2012

Happy Mothers Day!

We hosted a brunch at our house with some family, friends and neighbors.


The boys made some delicious goat cheese and leek tarts.


Of course we had to serve shrimp with remoulade!


Beautiful Daffodils from the Farmer's Market.


Lemon and Lavender Poundcake.


Mommy's Coffee


A beautiful painting done by Loch.


Felix made on too.


My new tomato plant!


The flowers are finally starting to bloom!


Can you believe this will be taller than me in just a few months?


Auntie Sandra with her lavender topiary afro!